
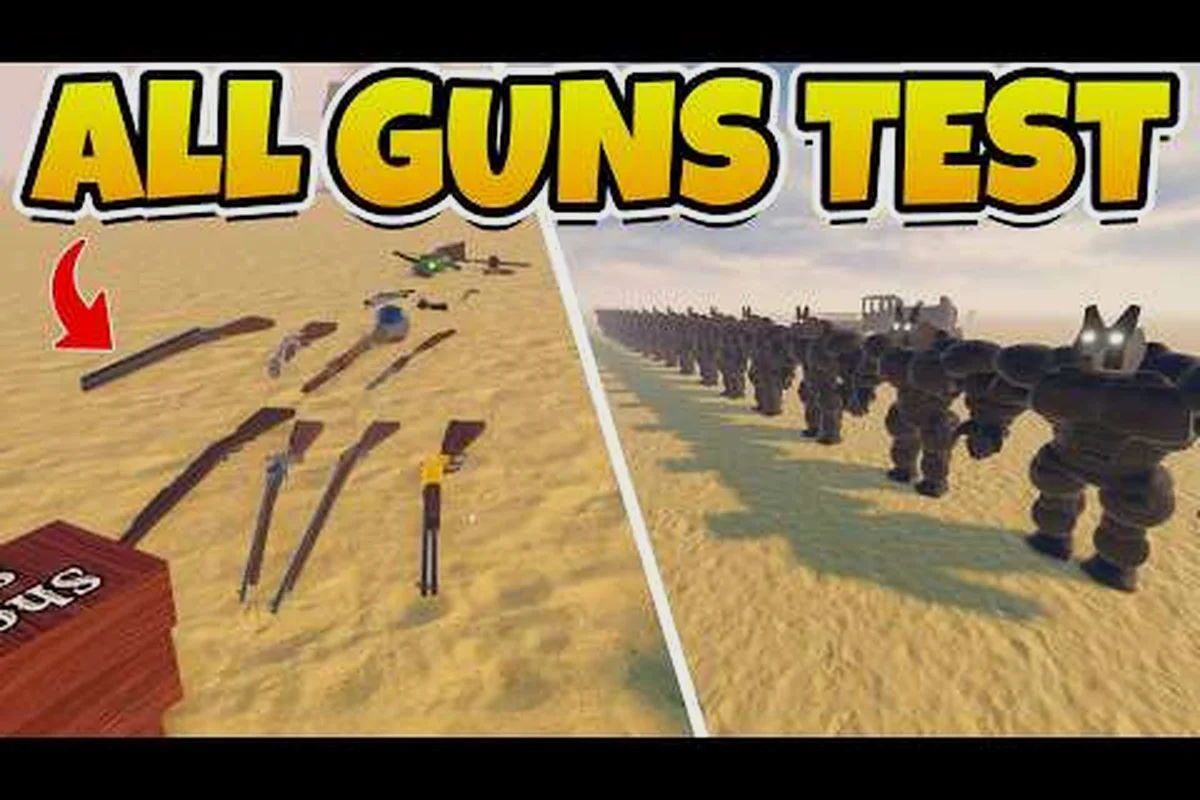
Dead rails gun damage depends on more than the number printed beside a weapon: headshots, ammunition type, reload timing, and enemy behavior can change the real value of a gun. Compare the Revolver, Navy Revolver, Shotgun, Mauser C96, and rifles before spending your limited cash, and learn which damage figures are reliable enough for route planning.
Dead Rails Gun Damage Fundamentals
Dead rails gun damage is most useful when it is treated as a practical combat budget rather than a single ranking. A weapon that deals more per shot is not automatically better if its ammunition is scarce, it reloads slowly, or it performs poorly against the enemies that appear on your route. The most reliable numbers in the current community testing are the Revolver, Navy Revolver, and rifle figures, while the Mauser C96 and sawed-off shotgun should be evaluated with care because their values may vary by version or encounter.
The core numbers reported by players are straightforward. The Revolver has a listed 35 damage and 50 on headshots, while the Navy Revolver reaches 50 damage and 80 on headshots. A standard rifle is reported at 60 damage and 120 for a headshot. The basic Revolver can be bought for $35 at the Gunsmith or obtained for 3 bonds in the lobby, making it one of the more accessible early weapons. A community weapons walkthrough also provides visual reference for these values, but players should verify current build details after patches.
| Weapon | Reported body damage | Reported headshot damage | Capacity | Practical note |
|---|---|---|---|---|
| Revolver | 35 | 50 | 6 rounds | Affordable early option |
| Navy Revolver | 50 | 80 | 6 rounds | Stronger headshot bonus |
| Standard rifle | 60 | 120 | 6 rounds | High potential per shot |
| Mauser C96 | Community values may vary | Community values may vary | Verify in current build | Use as a specialist option |
| Shotgun | Depends on pellet and weapon variant | Depends on pellet and weapon variant | Verify in current build | Best considered by total pellet output |
These figures come from community testing and may change after game updates, so treat them as a planning baseline rather than an immutable rule. For ammunition families and purchase planning, use the Dead Rails ammo reference alongside your weapon choice rather than treating damage as a standalone number.
Revolver and Navy Revolver Damage Comparison
The Dead Rails Revolver is the most straightforward starting point for players who want affordable access to strong headshots. Its reported 35 damage is enough to threaten ordinary enemies without consuming the highest-value ammunition in the game, while the 50-damage headshot improves its efficiency against priority targets. Six rounds per magazine is a meaningful limit: a miss or a poorly timed burst can leave you exposed during a night encounter.
The Dead Rails Navy Revolver is the stronger close-range option. Its reported 50 body damage and 80 headshot damage make every accurate shot count for more, but the Navy Revolver is harder to acquire because it can appear around Fort Constitution and in world loot. Availability matters in a survival run. A theoretically excellent gun that takes half the expedition to find may contribute less damage over the entire journey than a cheaper weapon that is already in your hands.
| Comparison point | Dead Rails Revolver | Dead rails navy revolver |
|---|---|---|
| Reported body damage | 35 | 50 |
| Reported headshot damage | 50 | 80 |
| Magazine capacity | 6 rounds | 6 rounds |
| Access | Gunsmith or lobby purchase | Fort Constitution and world loot |
| Best use | Early general-purpose defense | High-priority targets and stronger encounters |
A practical rule is to use the Revolver until a specific target makes its cheaper ammunition inefficient. The difference between 35 and 50 body damage matters most when several enemies survive a few shots, while the increase from 50 to 80 on a headshot is valuable against tougher enemies such as vampires, werewolves, or other high-pressure threats. Because enemy health figures can shift between versions, test the weapon against the threat you actually face instead of assuming a universal best gun.
For solo players, the Revolver often has the better opening-run value because its purchase cost is known and it does not depend on a lucky route. In a group, one player can carry the Navy Revolver while another protects the route and watches for enemies outside the immediate firing lane. The enemy tier reference can help identify which targets deserve the Navy Revolver’s stronger precision damage.
Mauser C96, Shotgun, and Sawed-Off Shotgun Performance
The Dead rails Mauser C96 occupies a specialist slot in the weapon roster. Community references include it among the game’s notable firearms, but the supplied current data does not provide a verified damage, magazine-capacity, or headshot value for it. That makes it risky to publish a precise number without checking the live build. The correct strategy is to compare the Mauser C96 against a weapon with confirmed figures and ask what advantage justifies its cost, ammunition, and availability.
The Dead rails shotgun is best analyzed by total damage potential, pellets, effective range, and reload pace. A shotgun can feel powerful when several pellets connect at close range, but its result may be less consistent against a fast target than a precise handgun or rifle shot. The Dead rails sawed off shotgun is similarly a close-range tool: its shortened format may suit a cramped defense around the train, yet a group approaching from different angles can make pellet spread and reload timing more important than the headline damage number.
| Weapon category | Damage data status | Best engagement | Main limitation |
|---|---|---|---|
| Mauser C96 | Verify current build | Compare rate, precision, and cost | No confirmed figure in supplied data |
| Shotgun | Variant-dependent | Close-range groups and crowd control | Spread and range |
| Sawed-off shotgun | Variant-dependent | Very close defense | Ammo consumption and reload timing |
| Revolver family | Community-tested baseline | Solo defense and accurate priority shots | Limited magazine |
| Rifle | Community-tested baseline | Long-range pressure and headshots | Higher cost and ammunition needs |
Do not use the phrase “highest damage” as a shortcut when comparing these options. Two weapons can show different body and headshot numbers while producing very different results in practice. The shotgun may erase a clustered group in one trigger pull but miss a retreating enemy, while the Mauser C96 may offer more controlled shots if its firing pattern supports that playstyle. Confirm the current tooltip, then test the weapon on a target with enough durability to reveal where its damage is actually landing.
The sawed-off shotgun also benefits from being evaluated in context. If the crew is defending a narrow platform or entrance, pellet coverage may outweigh theoretical range. If the train is moving and threats can approach from the sides, a weapon that can be aimed quickly and repeatedly may be safer. A dedicated Dead Rails sawed off gamepass analysis can help players compare permanent access options with the weapons they can already buy during a run.
Rifle Damage and Ammo Efficiency
The Dead rails rifle is the strongest confirmed conventional firearm in the supplied community data, with a reported 60 body damage and 120 headshot damage. Its six-round capacity creates a clear rhythm: aim, fire, and make every shot count. The doubled headshot value also means precision can produce exceptional results without relying on explosive effects or unusual status damage.
For a normal enemy, body shots provide an efficient way to finish a confrontation. Against a priority target, a rifle headshot can remove much more durability at once, making it preferable to a Revolver when ammunition is available. The trade-off is cost. A standard rifle is reported at $75, compared with the Revolver’s $35, so buying one means carrying less money for train maintenance, healing, or other urgent purchases.
| Damage calculation | Revolver | Navy Revolver | Standard rifle |
|---|---|---|---|
| One body shot | 35 | 50 | 60 |
| One headshot | 50 | 80 | 120 |
| Difference between body and headshot | +15 | +30 | +60 |
| Reported cost | $35 | Availability-based | $75 |
| Six-shot magazine | 210 potential body damage | 300 potential body damage | 360 potential body damage |
These totals assume every shot connects and ignores reloads, resistance, or special enemy rules, so they should not be read as guaranteed kill thresholds. They do, however, show why ammunition efficiency differs sharply. A rifle can deliver a target’s likely defeat condition in fewer shots, but a missed rifle round wastes more value than a missed revolver round. Carry enough reserve ammunition for the weapon you actually use, and do not mix ammunition families by assumption.
A standard rifle also complements a close-range weapon in a larger crew. One player can watch distant approaches with the rifle while others use shotguns or revolvers near the train. The Dead Rails ammo guide is particularly useful for calculating how many spare rounds fit in your inventory without sacrificing valuables or survival supplies.
Choosing Guns by Combat Situation
The best weapon depends on the combat situation, not only on the damage chart. A solo player benefits from predictable ammunition, an obtainable price, and the ability to create distance. A large crew can specialize more aggressively because other players can cover the blind spots that come with a narrow firing arc.
| Combat situation | Recommended starting choice | Reason |
|---|---|---|
| First solo run | Revolver | Known $35 price and useful headshot value |
| Fort or priority-target hunting | Navy Revolver | Reported 50 body and 80 headshot damage |
| Distant approaching enemies | Rifle | 120 reported headshot damage supports precision |
| Clustered enemies near the train | Shotgun | Multiple pellets can reward close-range positioning |
| Specialized high-value route | Mauser C96 | Compare current build stats before committing |
| Permanent-content consideration | Sawed-Off gamepass | Evaluate long-term access rather than one-run damage |
Headshots change the practical value of each weapon, but they should not become an excuse to ignore positioning. If the target is moving quickly or hiding behind scenery, the extra 15, 30, or 60 damage from a headshot may be irrelevant because the shot never lands. Conversely, a revolver headshot can remove a basic target efficiently when the shot is clean, making its lower purchase price less costly than it first appears.
Use a three-step decision process during a run:
-
Identify the likely threat. Basic enemies, grouped attackers, fast targets, and high-durability enemies reward different weapons.
-
Check inventory pressure. A stronger gun is inefficient if carrying its spare ammunition prevents you from bringing a healing item or train-repair resource.
-
Test before committing. One short burst near the train can reveal accuracy, reload time, and whether the reported damage matches the current version.
The Dead Rails Ray Rifle field manual is useful when comparing the standard rifle with the game’s more unusual weapons. Special properties may outperform a simple damage total, but they should never replace a basic firearm plan for players who still need affordable, dependable rounds.
Reading Damage Tests Without Misleading Results
A damage test should isolate the variable you want to test. Stand still, aim at the same body area, use the same ammunition, and compare consecutive shots. If you want to test the Mauser C96, do not mix it into a sequence of revolver shots against different enemies; that makes the result impossible to interpret.
Begin with a basic target and record the result, then repeat against a tougher enemy. Community testing generally reports a weapon’s listed damage and headshot multiplier rather than every possible interaction. Status effects, enemy resistance, special rules, and patch changes can make an in-game result look different. The supplied community notes mention that the Electrocutioner deals about 100 lightning damage and can recharge after being struck by lightning, while the Crucifix can instantly kill most entities on contact. These are special cases, not standard firearm benchmarks.
| Test variable | Keep it constant | Record | Reason |
|---|---|---|---|
| Weapon comparison | Enemy type and distance | Damage per shot | Prevents target differences from skewing results |
| Headshot test | Same weapon and ammunition | Body versus head result | Confirms the precision bonus |
| Ammo efficiency | Same firing pattern | Shots used and reloads | Shows real cost per encounter |
| Range test | Same target placement | Hit rate by distance | Separates damage from accuracy |
| Patch check | Current tooltip and build | Version date | Avoids repeating stale figures |
Treat headshot damage as a conditional multiplier, not an automatic guarantee. Precision damage is most valuable against enemies that remain still, approach through open space, or need only one accurate shot to fall. It is less useful against swarms, jumping targets, or enemies attacking from behind train structures.
The figures in this guide are based on community testing available during preparation and should be rechecked after updates. The Dead Rails gun damage gameplay video is a useful visual reference for weapon behavior, while the in-game tooltip and the latest player reports should determine the exact numbers used in your next run.
Building a Reliable Damage-Based Loadout
A strong loadout reserves damage for the threats that actually matter. Begin with one firearm that offers a known price or dependable access, then add only the ammunition you can realistically use. If you carry a revolver and a rifle, divide reserve rounds between the two rather than filling one stack and leaving the other unsupported.
| Role | Weapon pairing | Ammunition plan | Tactical purpose |
|---|---|---|---|
| Budget solo | Revolver plus melee | Mostly revolver rounds | Cover the train without overspending |
| Precision hunter | Navy Revolver or rifle | Ammunition for priority targets | Save stronger bursts for dangerous enemies |
| Close-range defender | Shotgun plus sidearm | Shells for close groups, rounds for distance | Handle separate engagement lanes |
| Advanced specialist | Mauser C96 plus rifle | Mixed reserve for different ranges | Use the C96 only when its build advantage applies |
The ammmo-to-threat ratio is more informative than raw carry capacity. Six rounds in a magazine can be valuable, but they are useless if the player has no matching reserve ammunition. Likewise, carrying a premium gun without spending enough on protection can leave the team unable to repair the train or keep moving. Money spent on ammunition should be part of the expedition budget, not an afterthought after collecting valuables.
Do not rely on one weapon for every phase. Daylight travel may favor speed and scouting, while night encounters reward precise shots and clear firing lanes. A close-range weapon can protect a doorway, but a rifle may be needed when enemies approach from farther away. Swap equipment when inventory space becomes more valuable than additional firepower.
For long-term progression, compare permanent unlocks separately from run-specific damage. The sawed-off gamepass can improve access across repeated expeditions, while a purchased gun or ammunition still shapes the current run. Make that distinction before deciding whether your next priority should be one-run damage or repeatable firepower.
Frequently Asked Questions
Which Dead Rails weapon has the highest confirmed headshot damage?
Among the conventional firearms covered by current community testing, the standard rifle has the highest confirmed figure at 120 headshot damage, compared with 80 for the Navy Revolver and 50 for the Revolver. These values can change after patches, so check the live weapon description before finalizing a route or spending money.
Is the Dead Rails Navy Revolver always better than the Revolver?
Not always. The Navy Revolver offers reported damage of 50 per body shot and 80 per headshot, but it is harder to acquire than the $35 Revolver. For an early solo expedition, the Revolver’s reliable access may produce more useful damage than a rare weapon that takes most of the route to find.
Should players buy a shotgun or a rifle for a long expedition?
Choose the rifle when enemies remain at a distance and the player can aim accurately, because its reported 120 headshot damage rewards precision. A shotgun is more practical against close groups when multiple pellets connect. A practical loadout can carry both, provided ammunition and inventory space remain manageable.
How much damage does the Dead rails Mauser C96 deal?
The supplied current community data does not include a reliable Mauser C96 damage or headshot figure, so an exact number would be speculative. Players should check the current weapon tooltip and recent community testing, then compare its rate of fire, ammunition use, and price with the Revolver and standard rifle before committing funds.
Does the Dead rails sawed off shotgun outperform regular firearms?
Not universally. Its close-range pellet coverage can be excellent when enemies bunch together around the train, while a rifle or revolver may perform better against isolated or distant targets. Evaluate the sawed-off shotgun by effective range, reload pace, ammunition supply, and the enemy patterns encountered on the selected route.