
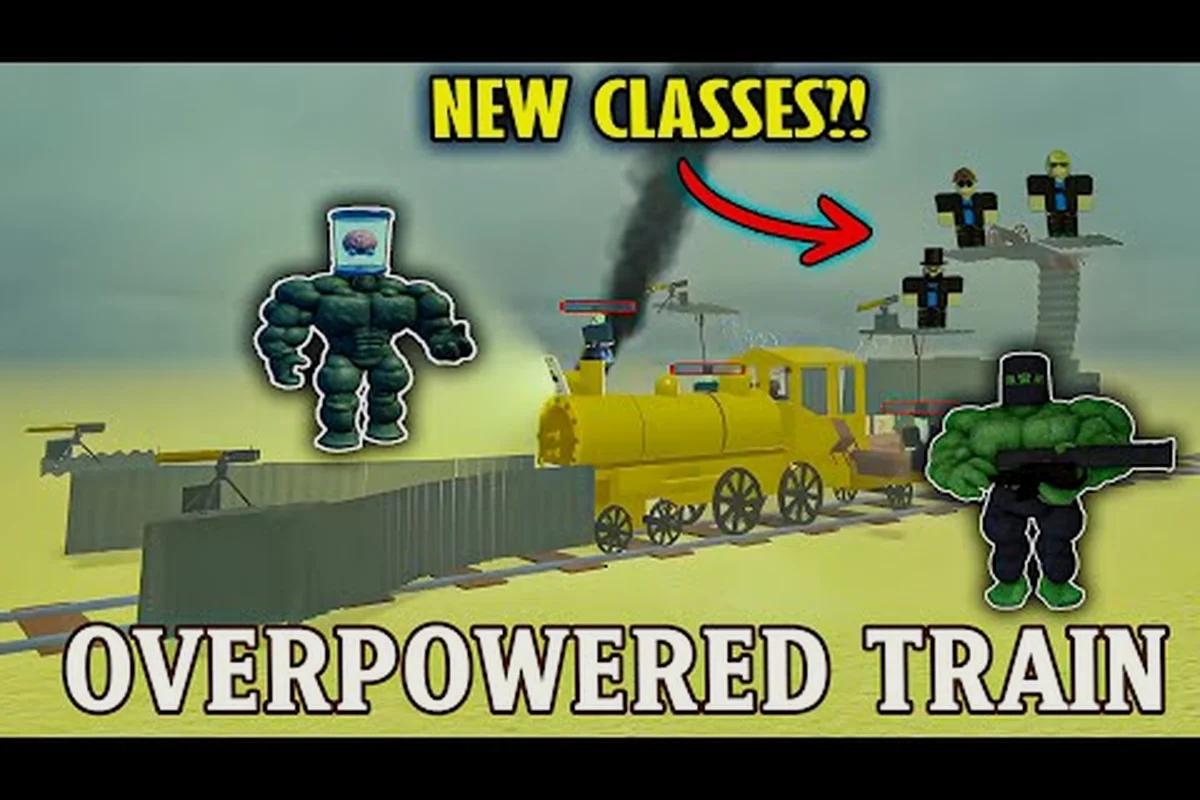
The Dead Rails Gold Rush train turns hauling capacity into a survivability problem: a heavier cargo load demands more boiler output, while long trips across hostile stretches leave less margin for repairs. A practical build should pair reinforced couplings and durable storage with fuel-efficient routing, because sacrificing top speed can prevent derailments or attacks. Armor also has a clear tradeoff—extra plating improves protection but raises mass, so the best configuration depends on whether the route favors open-country speed, chokepoint defense, or an extended supply run.
Dead Rails Gold Rush Train Overview and Core Strengths
The Dead Rails Gold Rush train is a practical choice for crews that need to move valuable cargo through hostile territory without giving up every defensive option. Its strongest appeal is flexibility: a prepared version can handle raids, carry supplies, and preserve enough momentum for the next route. Its main drawback is that added protection and equipment can make the locomotive heavier, slower, and more expensive to operate.
Community references currently describe fourteen locomotives, each balancing speed, cargo room, or armor differently. That variety makes the Gold Rush train easier to understand when compared with the Armored Train, which absorbs outlaw gunfire at a noticeable speed cost. A community gameplay reference also shows the broader train roster, although players should confirm details after patches because builds can change.
What Makes This Locomotive Worth Choosing?
The Gold Rush train appears suited to players who want more useful capacity than a basic starter without committing to a specialized fantasy locomotive. It offers a middle path between efficient movement and a rolling fortress. That balance makes it useful for groups that collect loot regularly but cannot afford to ignore hostile attacks.
A community gameplay reference can help place the Gold Rush train beside alternatives such as the armored train, passenger train, wooden train, ghost train, presidential train, and Dracula train, but exact roster details can shift after patches. Rather than treating it as an automatic upgrade, compare the locomotive’s cargo capacity, coal consumption, maintenance burden, survivability, and operating complexity; for example, a heavier Gold Rush build may survive repeated raids yet lose valuable minutes on a timed route if its speed and acceleration are too low. Players should therefore confirm current build data and test the train against their usual route before committing scarce materials.
-
Cargo value: The train should remain worthwhile even when a route has fewer enemies.
-
Protection level: Metal panels, barricades, and defensive equipment add survivability.
-
Operating burden: A heavier setup needs more fuel, maintenance, and coordination.
-
Speed tolerance: A train that handles pressure but cannot reach the next objective may still fail.
-
Crew complexity: More functions create more chances for mistakes during emergencies.
| Priority | Gold Rush train decision | Best use |
|---|---|---|
| Cargo efficiency | Keep valuable storage in accessible cars | Long routes with dependable checkpoints |
| Surviving raids | Reinforce doors, windows, and exposed positions | Frequent enemy encounters |
| Maintaining speed | Avoid unnecessary weight in every carriage | Timed routes and narrow escape windows |
| Fuel control | Carry measured spare coal and assign one driver | Night runs and extended travel |
| Flexible combat | Add only the defense needed for the route | Mixed danger and safe travel |
This makes the Dead Rails Gold Rush train less of a universal answer and more of a role-driven foundation. Players who continually overbuild it may lose much of the advantage that attracted them in the first place: extra carriages, metal panels, barricades, and mounted defenses improve protection, but also increase coal consumption, maintenance demands, and crew coordination. A heavily fortified Gold Rush train can therefore dominate a raid-heavy route yet surrender its efficiency during a timed run, especially when speed and acceleration decline under excess weight. The practical test is to reinforce only the vulnerable cars, keep valuable cargo accessible, reserve coal for acceleration, and compare the resulting build with the armored train, ghost train, or passenger train before committing rare materials.
How It Differs From Other Available Trains
The Dead Rails Gold Rush train sits in the middle of the roster rather than dominating every encounter: it handles cargo and survival tasks more effectively than the Dead Rails passenger train, while avoiding the speed penalty associated with the Dead Rails armored train. Its extra equipment can make it less efficient than the Dead Rails wooden train, but it offers a better balance when crews need hauling capacity, protection, and reliable movement across different threats. Exact performance may change between versions, so the comparison should reflect each run’s priorities instead of treating one locomotive as a universal best choice.
| Train option | Primary identity | Likely strength | Main trade-off |
|---|---|---|---|
| Dead Rails Gold Rush train | Practical cargo hauler | Balanced hauling and survival | Extra equipment reduces efficiency |
| Dead Rails armored train | Mobile defensive platform | Better protection from gunfire | Noticeable speed penalty |
| Dead rails passenger train | People-moving service | Passenger capacity and route character | Less suitable for maximum freight returns |
| Dead rails wooden train | Light traditional build | Straightforward construction and repair | Vulnerable to sustained attacks |
| Dead rails ghost train | Spectral theme | Distinctive appearance and atmosphere | Less conventional practical design |
| Dead rails presidential train | Formal luxury identity | Prestige and specialized presentation | Not naturally focused on rough cargo operations |
| Dead rails dracula train | Gothic horror theme | Strong visual identity | Specialty appeal over general utility |
The comparison should guide priorities rather than create a false universal ranking. An armored train can be better during a concentrated firefight, while a lighter train may be preferable when escaping is the only viable objective. The Gold Rush train is most attractive when neither maximum defense nor absolute speed is the sole requirement.
Gold Rush Train Parts and Practical Upgrade Choices
Useful upgrades for the Dead Rails Gold Rush train solve concrete problems: damaged entry points, exposed windows, limited coal, slow repairs, and weak fire response. A good build does not attach every available device indiscriminately. It prioritizes the failure most likely to end the run.
Community field notes report that metal sheets can cover windows and doors, barbed wire can block approaches, and turrets can provide automated fire. These are meaningful options, but their value changes with route conditions. A heavy defensive layer may preserve the train during a raid while making an otherwise manageable journey dangerously slow.
Prioritizing Structural Protection
Structural improvements generally produce the broadest benefits because they protect the train regardless of which enemy appears. A solid door stops bullets and slows attackers; covered windows reduce exposed firing lanes; barricades can make a doorway costly to enter. These defenses are more versatile than a single specialized weapon.
| Protection part | Primary purpose | Best stage to install | Why it may hurt |
|---|---|---|---|
| Metal sheet on doorway | Reduces gunfire entering the cabin | Before a heavily contested route | Adds weight and can narrow movement |
| Metal sheet on window | Limits exposed firing angles | Before night travel or ambush zones | Multiple panels multiply the speed cost |
| Barbed wire at an entrance | Delays close-range attackers | Where enemies must board | Requires a usable approach lane |
| Turret | Provides automated defense | Fort-like stops with sustained pressure | May waste ammunition or aim poorly |
The Dead Rails train armor overview expands on fortification materials and placement. For the Gold Rush train, the important question is not whether armor is good, but which openings the crew expects attackers to use.
Targeted plating beats full coverage. A small defense budget concentrated around the driver, fuel supply, and cargo access is often more useful than thin protection spread over every surface. Keep the locomotive usable instead of turning it into a stationary bunker.
Managing Cargo and Utility Space
Cargo arrangements determine whether the journey produces enough value to justify the fuel spent. Store the most important items in spaces that can be reached quickly, and avoid blocking access to repair supplies. A valuable train still fails if a broken wheel or damaged door cannot be repaired in time.
The Dead Rails gold bar guide is useful for understanding the value of metal loot and why protecting a haul can be as important as defending the crew. Keep high-value cargo grouped for a quick transfer, but do not store it where an explosion or repeated breach would destroy everything at once.
A practical cargo plan includes assigning priority zones before the Dead Rails gold rush train departs: load the main haul near a working door, keep coal and repair items on the opposite side to balance weight, and mark the crew’s access route before the locomotive starts. For example, if the crew expects an armored-train breach, place gold bars and coal in separate cars so one destroyed compartment does not remove both profit and fuel; this preserves repair options during a raid.
-
Primary haul: The most valuable materials, positioned for fast unloading.
-
Emergency supplies: Coal, repair items, and defensive consumables kept immediately accessible.
-
Distributed reserve: A smaller backup amount stored away from the main haul.
-
Low-value storage: Bulky or replaceable items placed in outer positions.
-
Crew access: Clear paths to doors, controls, repair points, and fire equipment.
For a dead rails gold rush train, make the cargo plan visible by assigning each crew member a zone and a fallback. If one player searches the rear car for gold bars while another checks the locomotive, a breach or derailment can waste the critical seconds needed to secure the main haul. For example, designate one player as the loader, one to watch the doors, and one to protect the coal; when an armored train attacks, the crew can retrieve the Dead Rails gold bar from the priority zone, leave the distributed reserve untouched, and keep the locomotive supplied with coal. This division reduces confusion, prevents valuable cargo from being scattered during a crisis, and ensures the engine can still move after the train’s defenses are damaged.
Fuel, Speed, and the Gold Rush Train Operating Plan
Fuel management determines whether the Dead Rails Gold Rush train reaches its destination or becomes a stationary obstacle. Community troubleshooting reports identify an empty stove, blocked track, and driver error as common reasons a train stops. Spare coal should therefore be treated as mission equipment, not an optional luxury.
Building a Sustainable Fuel Plan
Fuel planning begins with a simple rule: carry enough reserve to reach a known resupply point, then add a modest safety margin for detours. Exact consumption depends on speed, mass, terrain, weather, and the current build, so a fuel figure copied from another route may be misleading. Measure consumption during the first part of the run instead of assuming every train behaves identically.
| Operating choice | Fuel effect | Speed effect | Risk |
|---|---|---|---|
| Light cruising pace | Lower | Lower | Slower response to danger |
| Normal travel pace | Moderate | Moderate | Vulnerable if a chase begins |
| High-speed travel | Higher | Higher | More fuel and weaker braking control |
| Full defensive load | Often higher indirectly | Usually lower | Greater protection, less agility |
| Stripped travel load | Usually lower indirectly | Usually higher | Less protection during a fight |
| Balanced load | Managed | Managed | Requires route awareness |
One designated driver improves efficiency. The driver can watch speed, signals, fuel, and obstacles while another crew member handles repairs or enemies. Assigning another person to override steering at the wrong moment can send a moving train into debris or cause confusion during a night spawn.
Basic operating practices for a dead rails gold rush train center on balancing speed, coal consumption, and survivability. A light load can improve acceleration and reduce fuel use, but it leaves the armored train less able to absorb a raid; a balanced load is usually safer when crossing enemy territory, while a stripped-down passenger or wooden train setup can move faster but offers little protection. For example, if a chase begins near a coal deposit, a heavier train may survive the first exchange, yet its longer stopping distance and greater coal demand can make escape difficult. Treat the table’s trade-offs as route-specific guidance, not fixed rules: rising from a light cruising pace to normal travel pace increases fuel use but shortens response time, whereas high-speed travel saves time at the cost of weaker braking control.
-
Keep coal in a dedicated, clearly assigned storage area.
-
Check the stove before beginning a dangerous stretch.
-
Assign one driver and one navigator during major routes.
-
Clear debris ahead of the locomotive whenever possible.
-
Carry enough coal to survive a delay rather than only the expected arrival time.
-
Re-arm before entering a known fort or boss area.
-
Remove temporary defensive gear when speed becomes more important than staying intact.
When Speed Should Beat Protection
There are moments when a fully protected Gold Rush train is the wrong configuration. If enemies are close behind, a slow locomotive can become trapped in an open area. In that case, removing a heavy panel or leaving a barricade behind may be more valuable than preserving maximum defense.
The best decision depends on the immediate threat. A stationary turret is useless if the train cannot move before an enemy reaches the coupling. For example, when a Gold Rush train is crossing an open stretch with enemies closing from behind, a single unbarricaded carriage can cost more momentum than the turret provides; shedding that weight and using the locomotive’s acceleration to create distance may be the stronger play, especially compared with a fully armored Dead Rails armored train built for enduring fire.
-
Identify the threat: Separate enemies that require boarding from those attacking at range.
-
Measure the distance: Check whether the train can reach a safe route or checkpoint first.
-
Remove the right weight: Strip only the equipment that contributes most to the slowdown.
-
Create separation: Use speed to gain distance rather than trying to outlast every pursuer.
-
Restore the build: Reinstall defenses at a safer location before the next engagement.
This approach treats the train as a changing tool. The Dead Rails armored train is better when sustained fire is unavoidable, but the Gold Rush train can match it in short bursts by keeping its weight down and using favorable terrain.
Dead Rails Gold Rush Train Build Recommendations by Route
No single setup handles every route in Dead Rails. The most effective build reflects whether the run prioritizes loot, fighting, travel time, or safe extraction. Because exact train statistics can change after updates, these recommendations rely on reported trade-offs rather than fixed, potentially outdated values.
Cargo-Focused Route
A cargo-focused journey should preserve route efficiency while keeping the haul reasonably safe. Use moderate armor around the locomotive and valuable cars, leave outer storage less protected, and avoid spending the entire budget on weapons. A train that arrives slowly with a full load can still outperform a fast one that loses its cargo during a boarding attempt.
| Build area | Recommended setup | Reason |
|---|---|---|
| Driver cabin | Light protection and clear visibility | Preserves control and reaction time |
| Valuable car | Strong doors and selected window coverage | Protects the main return |
| Outer cars | Minimal plating | Reduces total weight |
| Fuel area | Easy access to spare coal | Prevents costly stops |
| Cargo layout | Grouped valuables and separate backup supplies | Supports quick collection and recovery |
For a passenger train role, prioritize safety and dependable acceleration over dense cargo storage. A Gold Rush train configured like a passenger carrier should keep aisles open, distribute weight sensibly, and avoid turning every compartment into a stockpile. Passengers need a train that can stop, start, and change direction without excessive delay.
Heavy-Raid Route
A heavy-raid route reverses the priority. Install metal sheets at likely firing lanes, block the principal entrance, and add a turret where the crew can maintain a defensible position. Accept a lower cruising speed because the route will soon punish a train that cannot survive contact.
The Dead Rails cannon guide can help players consider how fixed or deployable firepower complements locomotive defense. A cannon may be better for crew-directed defense, while a turret can react more quickly, but neither replaces sound fuel management and protected access to the train's controls.
Balanced Exploration Route
The best general-purpose version uses medium armor, reserved coal, organized cargo, and a clear driver assignment. This setup tolerates occasional attacks without committing to the slowest possible configuration. It is a sensible first build for players learning the Gold Rush train because each function is easy to understand and adjust.
Community field notes suggest that crews often strip plating for faster sections and restore it before a fort or boss encounter. That temporary approach works well when the crew knows where the next safe area is. If the route contains repeated fights with little room to recover, permanent reinforcement may be worth the speed cost from the start.
Specialized Gold Rush Train Alternatives and Comparisons
The Gold Rush train sits within a roster of specialized locomotives, and those differences matter when a squad wants a particular role. The Dead Rails passenger train, wooden train, ghost train, presidential train, and Dracula train each emphasize a distinct identity. They may appeal through appearance, passenger use, lightweight construction, or atmosphere, but the practical question remains whether their requirements fit the route.
The video demonstrates how gold can be gathered and transported along the rails in dead rails gold rush train. According to the Dead Rails gold rush train gameplay video, the train can haul gold while navigating the abandoned rails. ### Passenger and Cargo Orientations
A passenger-focused train should be evaluated for reliable movement, boarding safety, and protection for people rather than maximum freight density. A Gold Rush train can imitate a passenger role, but it should not be overloaded with materials until its braking and acceleration become difficult. A passenger service profile should include open aisles, stable acceleration, protected boarding points, and enough stopping distance.
A cargo-focused route has a different priority. The Gold Rush train becomes more competitive when players can organize weight, protect the most valuable cars, and maintain a steady fuel supply. Passenger and cargo designs can even work together, but only if the crew does not sacrifice both. Overloading a passenger layout or stripping a freight train to minimum defense creates weaknesses in either approach.
| Criterion | Passenger-oriented build | Cargo-oriented build |
|---|---|---|
| Main objective | Move people safely | Return valuable materials |
| Weight distribution | Even and predictable | Valuable mass concentrated sensibly |
| Protection focus | Doors, aisles, boarding areas | High-value cars and access points |
| Best route | Frequent stops with controlled threats | Longer routes with hostile encounters |
| Main mistake | Blocking exits | Ignoring acceleration and fuel cost |
Character-Oriented Alternatives
The ghost train, presidential train, and Dracula train offer stronger visual themes than the practical Gold Rush train. Their appeal may matter to players who enjoy a distinctive locomotive, yet style should not obscure mechanical evaluation. Check how many functional openings remain, whether equipment can be installed, and how the mass affects movement.
The wooden train may be easier to repair or more forgiving in early routes, while a heavily damaged wooden structure can still fail quickly under concentrated fire. The presidential train emphasizes ceremony and luxury, making it better for role-focused play than hauling improvised cargo. The Dracula train carries a gothic identity that works well for atmosphere, but its thematic appearance does not automatically translate into stronger armor.
| Alternative | Best reason to use it | Reason to choose Gold Rush instead |
|---|---|---|
| Wooden train | Light, traditional, repairable character | More practical cargo and defense planning |
| Ghost train | Unusual spectral presentation | Straightforward hauling role |
| Presidential train | Formal or prestigious character | Utility-focused journey |
| Dracula train | Gothic horror atmosphere | Broad cargo and defense flexibility |
| Armored train | Maximum protection emphasis | Better balance between protection and mobility |
Players should use the Dead Rails game release notes to verify whether locomotives, prices, or components have changed in a recent update. The community references used here were verified in October 2026, but later patches may alter balance, unlocks, or available equipment.
Maintenance, Troubleshooting, and Recovery Tactics
A reliable Dead Rails Gold Rush train needs a recovery plan, not merely a strong build. Damaged doors, debris on the rails, low coal, and divided crew attention can turn a small problem into a complete stop. A clear maintenance routine limits the time between damage and further failure.
Preventing Common Stops
Community reports on the dead rails gold rush train identify the stove, track, and driver error as frequent causes of a stopped train, so check them in that deliberate order when the locomotive loses momentum. A cold stove can leave the boiler without usable steam even if the coal bunker is full, while a failed switch or debris on the rails can halt the entire consist before the driver’s inputs matter. Treat the first three causes as a linked diagnosis: inspect the fuel and firebox, scan the track immediately ahead, and confirm the driver’s intended direction. If the train still remains motionless after those checks, move to mechanical damage and crew status rather than repeatedly changing the controls, which may make the recovery harder.
-
Fuel first: Confirm the stove contains coal and that the fire has not gone out.
-
Obstacles second: Inspect the track ahead for debris, damaged switches, or other blockages.
-
Controls third: Verify the driver knows the current direction and that no one is fighting the controls.
-
Damage fourth: Inspect the engine and couplings for a serious mechanical obstruction.
-
Crew status fifth: Determine whether the driver can continue or needs to be replaced.
| Symptom | Likely checks | Recovery priority |
|---|---|---|
| Engine stops without warning | Stove fuel, driver input | Restore fuel or clear confusion |
| Train slows near debris | Track ahead, coupling | Remove obstruction before repairs |
| Frequent derailment | Load balance, speed, route | Reduce speed and rebalance weight |
| Doors stop opening | Hinges, barricade, obstruction | Clear the access route |
| Defense performs poorly | Ammunition, facing direction, damaged parts | Repair before relying on it |
| Fuel disappears quickly | Weight, speed, long route | Ease pace or reduce load |
Keep a repair kit where a crew member can reach it without leaving the train exposed. A remote emergency supply is better than none, but it is not useful during a fast boarding action. The best recovery kit includes basic repair items, a small coal reserve, and clear instructions for who handles each category.
Rebuilding After a Fight
After a successful defense, do not immediately assume the train is ready for another encounter. A door may be weakened even if it still opens, and a damaged component can fail later under added strain. Use the first safe stop to repair essentials, refill the stove, collect ammunition, and reorganize access.
A practical reset includes a structured maintenance cycle for the gold rush train: assign a crew member to inspect the locomotive, repair the driver cabin and primary entrance, restore the fuel supply, and check exterior damage before the armored train resumes its route. Reassigning crew positions after combat is essential, and cargo should be moved only when necessary. This prevents weakened doors, damaged components, and uneven loads from turning the next run into a repeat of the previous fight.
-
Repair the driver cabin and primary entrance first.
-
Restore the fuel supply before increasing speed.
-
Check exterior damage that could snag or derail the train.
-
Reassign crew positions after someone switches roles.
-
Move the heaviest or most valuable cargo only when necessary.
-
Remove barricades only when the immediate threat has passed.
The broader cemetery and train-control guide provides the operating details needed to standardize this reset. Use its locomotive and refueling procedures during the first safe stop, then compare the repaired gold rush train’s condition with the damage taken in the fight. This gives the crew a concrete basis for deciding whether the driver cabin, primary entrance, fuel supply, and exterior armor are ready for another run instead of resuming on assumption.
Dead Rails Gold Rush Train Final Build Checklist
The strongest Dead Rails Gold Rush train is a train that changes with the route, not the one carrying the largest number of parts. Begin with a sound core: adequate coal storage, protected control access, clear cargo placement, and one responsible driver. Add structural armor around likely attack points, then reserve heavier defenses for routes where sustained fire is unavoidable.
| Build check | Final requirement |
|---|---|
| Fuel | Reserve coal is accessible and sufficient for the planned route |
| Driver | One clear person controls speed and direction |
| Cargo | High-value materials are grouped and reachable |
| Protection | Doors and exposed windows cover likely firing lanes |
| Weight | Temporary armor is removed when speed is essential |
| Recovery | Repairs and emergency tools are within reach |
| Comms | Everyone knows who drives, repairs, and defends |
This checklist also provides a useful way to compare the Gold Rush train with the armored, passenger, wooden, ghost, presidential, and Dracula alternatives. A themed train may look more striking, but the practical build wins when it can keep moving, protect its crew, and preserve the cargo that made the trip worthwhile.
Frequently Asked Questions
Is the Dead Rails Gold Rush train better than the armored train?
Not always. The Gold Rush train is generally more flexible when speed, cargo, and defense need to share one budget, while the armored train makes sense when absorbing gunfire is the main objective. Community reports indicate that added armor noticeably reduces speed, so the better choice depends on whether the route allows escape or demands prolonged defense.
What parts should the Dead Rails Gold Rush train receive first?
Start with the parts that protect essential functions: metal sheets on vulnerable doors and windows, accessible coal storage, and a clear driver cabin. Barbed wire and turrets are stronger additions for known forts or dangerous routes, but early upgrades can make the train unnecessarily slow if every surface is covered at once.
Does the Dead Rails Gold Rush train use much fuel?
Fuel use rises with speed, mass, and difficult terrain, while a heavily armored train can be less efficient than a stripped version. No dependable universal consumption figure is available, so track consumption during a run, keep a dedicated coal reserve, and avoid carrying more weight or speed than the route requires.
Can passengers use the Dead Rails passenger train style with this locomotive?
Yes, a Gold Rush train can be arranged with a passenger-oriented layout, but it should prioritize stable movement, clear aisles, safe boarding, and controlled acceleration. A conventional Dead Rails passenger train may fit that role more naturally, while the Gold Rush train is strongest when its flexible cargo-and-defense design serves the route.
How do players recover when the Gold Rush train stops?
Check the stove and coal supply first, then inspect the track for debris and confirm the driver’s intended direction. Community troubleshooting identifies these as common causes. Keep one crew member with the controls, assign another to repairs, and avoid changing drivers or speed settings simultaneously during an emergency.